Global Custom Fonts
In the Settings → Global → fonts.yml
Themes
Assign which themes should use these fonts:
- leave all unchecked to disable fonts entirely
Custom Fonts
To add custom fonts, use the “Manage: FONTS” button which will open in another tab.
Supported formats:
-
.woff2(recommended for best compression) .woff.ttf.otf
After uploading the font file, use the COPY FILENAME button in the fonts list.

Paste the filename into the Settings like so:
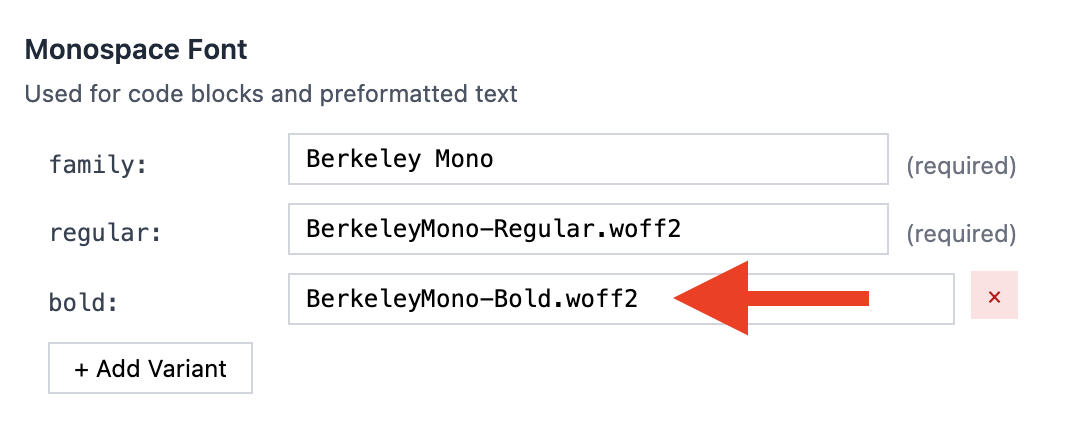
SAVE CONFIGURATION and the fonts should update on the site.
Fonts roles
There are 4 font roles in Roe CMS:
| Role | For | CSS variable |
|---|---|---|
| Heading | headings, logo/site title | --font-heading |
| Body | body/smaller text | --font-body |
| Monospace | Code, tables | --font-mono |
| Accent | Additional font as needed | --font-accent |
You can also + Add Custom Family if you need to. If you add “Display”, this will create a new CSS variable which you can then use in your theme:
--font-display
Each font role can support as many variants as you like but we recommend as few as possible:
Recommended for Heading
- bold/semibold/black (one of these)
- light (optional)
Recommended for Body
- regular
- bold
- italic
- bold_italic (optional)
Recommended for Mono
- regular
- bold (optional)