Related documentation
Installing Roe
Roe is an application built with Ruby on Rails. In order to use Roe locally, you’ll need to install a few tools on your computer as well as Rails. This is the biggest hurdle to using Roe, well worth it and once it’s done, you can create as many Roe sites as you want without having to reinstall anything.
Currently, I have not tested Roe on Windows. If you’re interested in getting it working, I would love the help: roe@weareontheweb.com
1) Download Roe
Roe is just a folder that contains 2 important folders: /current (the app/code) and /site (all your site content, configuation, and databases) as well as a few other files. When you download it, you’ll see the roe-v… folder, you can name this anything you like or leave it as is.
If you decide to rename the roe-v… folder, just note what you called it.
macOS
2) Open the Roe folder in your terminal
On Mac, you can do this with cd in the terminal which means change directory. If the Roe folder is in your user directory, you can use this:
cd ~/roe-folder-name
Finder
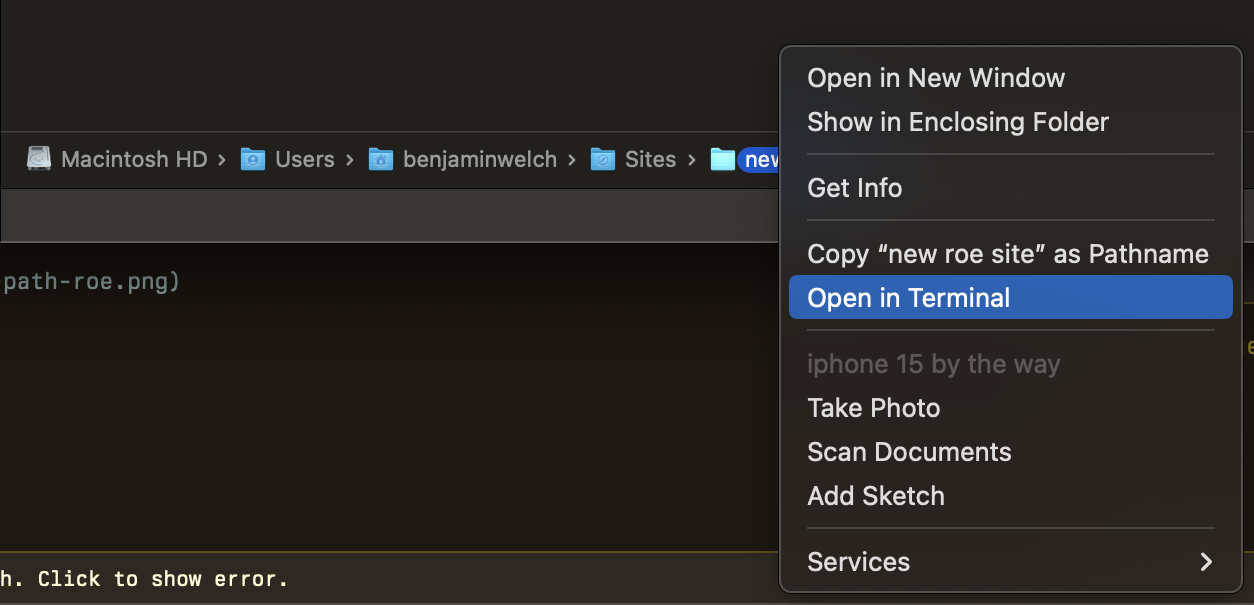
- In the Mac menu for Finder, select
View → Show Path Bar - You’ll see the Roe folder at the bottom of the window, right click it and select
Open in Terminal

3) Run the Roe install command
Once you’re in the Roe folder within the terminal, run this command:
./roe.sh check
This will:
- check your system for the tools that Roe needs and give instructions on installing them
- set up all required databases and files
- set up an admin user
- Installing Tools: follow the prompts, and type
(c)thenenter/returnto continue.- Note: some of these can take a look bit, you should know if there is an error. Wait and until it finishes.
- Once the tools are installed, you will see this message:
[✓] All required dependencies are installed!
- Roe setup: you’ll see
Next step: Run the Roe setup, typeyand pressenter/return.- All required gems will be installed, the databases and other assets will be created.
- Admin user: Once that’s done, you’ll see:
No admin user found. Let's create one…- Enter the email you want to use for Roe
- Choose whether to use a randome or manual password.
- Note: either way, write this down in a safe place.
- Recovery codes: write these down in a safe place, you won't ever see them again
- Used to reset your password if you’re unable to login.
- Once you’ve written everything down (or saved it), click
return/enterto continue. - Type
yand hitreturn/enterto start the Roe server and open Roe in your browse automatically. - Sign in with the admin user you just created.
Check Getting Started with Roe for things to check out.
Linux
2) Open the Roe folder in your terminal
On Linux, you can do this with cd in the terminal which means change directory. If the Roe folder is in your home directory, you can use this:
cd ~/roe-folder-name
File manager
Most Linux file managers can launch a terminal in the current folder. The exact menu name varies by distribution:
-
GNOME Files (Nautilus) — right-click inside the Roe folder and select
Open in Terminal. If you don’t see this option, install the helper:sudo apt-get install nautilus-extension-gnome-terminal(Ubuntu/Debian) or the equivalent for your distro. -
KDE Dolphin — open the Roe folder, then press
F4to drop into an embedded terminal already pointed at it. Or right-click and selectOpen Terminal Here. -
Other file managers — most have a similar
Open Terminal Hereoption in the right-click menu. If not, fall back to opening a terminal manually andcd-ing into the folder.
If your distribution doesn’t ship one of these by default, this document is a good general reference: How to Open a Folder in Linux.
3) Run the Roe install command
Once you’re in the Roe folder within the terminal, run this command:
./roe.sh check
This will:
- check your system for the tools that Roe needs and give instructions on installing them
- set up all required databases and files
- set up an admin user
- Installing Tools: follow the prompts, and type
(c)thenenter/returnto continue.- Note: some of these can take a look bit, you should know if there is an error. Wait and until it finishes.
-
Note for Linux: the script will show install commands for both Debian/Ubuntu (
apt-get) and Fedora/RHEL (dnf) — copy and run the one for your distribution. - This is a helpful article about Linux pacakge managers: Comparison of major Linux package management systems
- Once the tools are installed, you will see this message:
[✓] All required dependencies are installed!
- Roe setup: you’ll see
Next step: Run the Roe setup, typeyand pressenter/return.- All required gems will be installed, the databases and other assets will be created.
- Admin user: Once that’s done, you’ll see:
No admin user found. Let's create one…- Enter the email you want to use for Roe
- Choose whether to use a randome or manual password.
- Note: either way, write this down in a safe place.
- Recovery codes: write these down in a safe place, you won't ever see them again
- Used to reset your password if you’re unable to login.
- Once you’ve written everything down (or saved it), click
return/enterto continue. - Type
yand hitreturn/enterto start the Roe server and open Roe in your browse automatically. - Sign in with the admin user you just created.
You’re done
Check Getting Started with Roe for next steps.